Introduction
IP Filter is a plugin for WordPress. It lets you grant or deny access to your website using a list of IP addresses.
Features
- Filtered visitors will get a 403 Forbidden page.
- Two filters available: “grant” (IP Filter IP list will act as a white list) and “deny” (it will act as a black list). The default filter type is “deny”
- Wildcard character “*” allowed to filter a group of IPv4 addresses
- Blocked IP addresses can be logged
- The error message is customizable and can contain HTML
- IP addresses to be filtered can be typed in a text zone. Here is a list of what you can put in this text zone:
- Free format, you are not limited to put one IP address per line
- Comments are allowed and will be ignored by IP Filter, but they should not contain IP addresses and the “*” character
- IPv4 and IPv6 addresses are allowed
- Wildcard character “*” is accepted for IPv4 but it must represent a complete field. IP addresses without wildcard can’t be truncated. Examples:
- Correct: 10.20.30.40
- Correct: 10.20.*.40
- Correct: 10.*.*.*
- Correct: 10.*
- Correct: *.20
- Correct: *
- Incorrect: 10.2*
- Incorrect: 10.20
- Incorrect: 10.2*.30.40
Be careful to not block yourself!
Screenshot
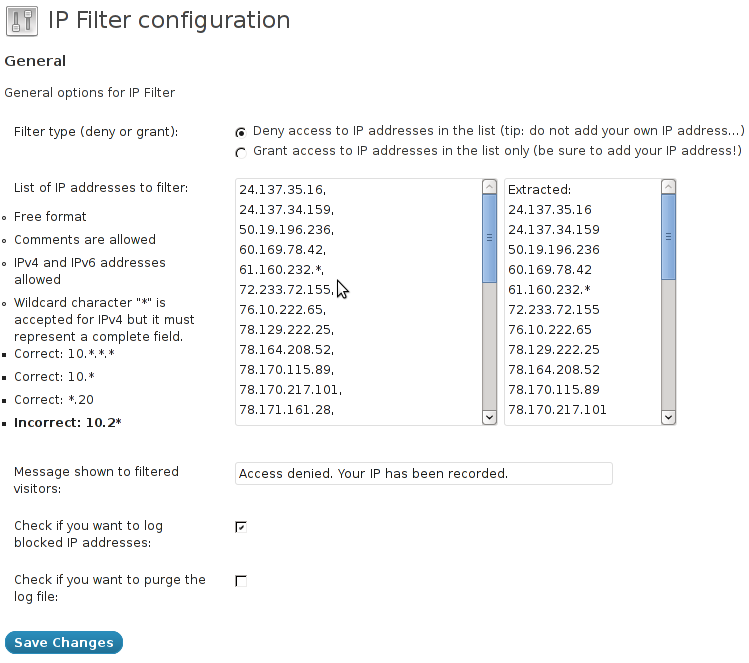
Notes
If you happen to block yourself, remember that you still can access your administration area by typing the URL “/wp-admin/” after your domain name. Additionnally, you can also add the URL parameter “ipfilter_bypass” to bypass the filter (eg: “http://www.mysite.com/?ipfilter_bypass”).
Installation
The installation of IP Filter is very easy. Just extract the plugin directory into your wp-content/plugins directory, and add the IP addresses to filter in the IP Filter options page.