

I wrote an updated tutorial for OpenBSD 6.1, click here to read.
Introduction
OpenBSD 4.8 has been released, and for the end-user, nothing has changed much except that the packages almost all come in a newer version.
There’s probably plenty of tutorials around there explaining how to install OpenBSD, but I wrote that one in addition to my previous tutorial, “Installing Gnome Desktop and Gnome Display Manager on OpenBSD”. I will try to tell in detail every action I did to install OpenBSD.
For this tutorial, I will use a VirtualBox virtual machine as OpenBSD does not support my laptop RAID configuration yet.
Any keyboard non alphanumeric key will be represented between braces. For example, “{Enter}” means “press the Enter key once”.
Prerequisites
You will need the following :
- About 2 GB of free space to install it (could be much more or less depending on what you plan to do with it once installed)
- An ISO image of the system. Get it here : http://ftp.openbsd.org/pub/OpenBSD/4.8/ then navigate to the location of the image adapted to your system. I personally used this image : http://ftp.openbsd.org/pub/OpenBSD/4.8/amd64/install48.iso. Burn this image to CD or use it directly in your virtual machine favorite software.
- An Internet connexion (optional)
- About 15 minutes to install the system
Installation
Boot your computer with the CD image inserted. You may need to adjust your BIOS parameters in order to boot from the CD first.
You will see the welcome screen inviting you to install the system :
Welcome to the OpenBSD/amd64 installation program.
(I)nstall, (U)pgrade or (S)hell?
I{Enter}
Next, you will be prompted to choose your keyboard layout. My computer having a French keyboard, I had to choose it explicitly.
Choose your keyboard Layout
L{Enter}
fr{Enter}
Next, you can enter your machine name.
System hostname ?
gabopenbsd{Enter}
Here’s come your network configuration. I’ll let my router do the job with its internal DHCP server.
Available network interfaces are: em0 vlan0

Which one do you wish to configure? (or 'done') [em0]
{Enter}

IP adress v4 for em0? (or 'dhcp' or 'none') [dhcp]
{Enter}

IPv6 address for em0? (or 'rtsol' or 'none') [none]
{Enter}

IPv6 prefix length for em0? [64]
{Enter}

Available network interfaces are: em0 vlan0
Which one do you wish to configure? (or 'done') [done]
{Enter}

Do you want to add any manual network configuration? [no]
{Enter}
The next step is important : choose your root password. Choose a strong password that you can remember.
Password for root account? (will not echo)
(rootpassword){Enter}

Password for root account? (again)
(rootpassword){Enter}
You can accept the defaults for the two next questions.
Start sshd(8) by default? [yes]
{Enter}

Start ntpd(8) by default? [no]
{Enter}
If you plan to use a graphical environment, I advise you to choose “yes” for the following question. Choose “no” otherwise.
Do you expect to run the X Window System? [yes]
{Enter}
Type “yes” if you want the X Window System to start when xdm is launched, “no” otherwise”. I personally choose “yes”.
Do you want the X Window System to be started by xdm(1)? [no]
yes{Enter}
You can add a user to your system here. Just type the desired user-name if you wish to add a user now.
Setup a user? (Enter a lowercase login name, or 'no') [no]
gabriel{Enter}

Full user name for gabriel? [gabriel]
Gabriel Hautclocq

Password for gabriel account? (will not echo)
(user password){Enter}

Password for gabriel account? (again)
(user password){Enter}

Since you set up a user, disable sshd(8) logins to root? [yes]
{Enter}
You can now define your time zone. If you are connected to the Internet, the default should be good.
What timezone are you in?
{Enter}
An important part of the installation process: setting up your hard drive. You can choose here which hard drive you wish to install OpenBSD. As I install in a virtual machine, I only have one hard drive called “wd0”.
Available disks are: wd0
Which one is the root disk? (or 'done') [wd0]
{Enter}
Here is your chance to edit the MBR. If you don’t know what that means or you don’t need to, just accept the default.
MBR has invalid signature; not showing it.
Use (W)hole disk or (E)dit the MBR? [whole]
{Enter}
You can let OpenBSD to define partitions automatically, or edit the automatically generated layout, or define a custom layout. If the automatic layout seems to fit your needs, just press Enter. Otherwise, typing “e” will let you resize the partitions.
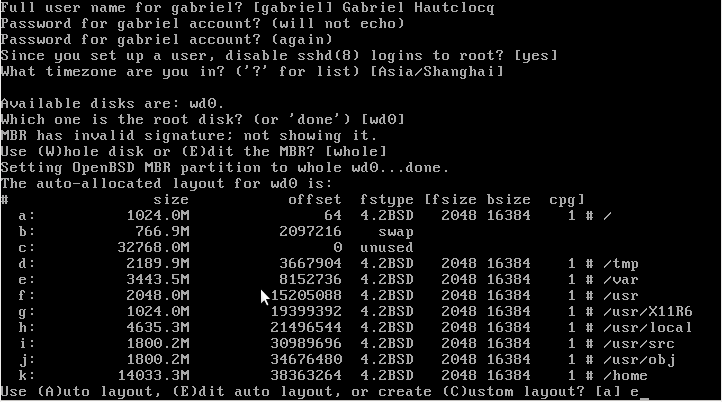
The automatic layout generated by OpenBSD for a 32 GB hard drive
If you accept the auto layout :
Use (A)uto layout, (E)dit auto layout, or (C)reate custom layout? [a]
{Enter}
Then go to next section.
Or if you want to resize the partitions (recommended if you want to install Gnome for example) :
Use (A)uto layout, (E)dit auto layout, or (C)reate custom layout? [a]
e{Enter}
Although it looks a little stark, it is actually easy to resize your partitions. Some useful commands:
Display the partition list with their size in MB:
> p m{Enter}
You can see that each partition has its own letter.
Resize a partition:
> R letter{Enter}
+size_in_megabytesM{Enter} will increase the partition size of "size_in_megabytes" MB.
-size_in_megabytesM{Enter} will decrease the partition size of "size_in_megabytes" MB.
Accept changes and quit:
> q{enter}
Cancel changes and quit:
> x{Enter}
For example, my /home partition was too big, and some other partitions were too small to install Gnome and GDM. So I resized them :
> p m{Enter}

> R k{Enter}
grow (+) or shrink (-) (with unit): [0] -10000.0M{Enter}
> R a{Enter}
grow (+) or shrink (-) (with unit): [0] +5000.0M{Enter}
> R b{Enter}
grow (+) or shrink (-) (with unit): [0] +500.0M{Enter}
> R d{Enter}
grow (+) or shrink (-) (with unit): [0] +1000.0M{Enter}
> R e{Enter}
grow (+) or shrink (-) (with unit): [0] +1000.0M{Enter}
> R f{Enter}
grow (+) or shrink (-) (with unit): [0] +1500.0M{Enter}
> R i{Enter}
grow (+) or shrink (-) (with unit): [0] +1000.0M{Enter}
> q{Enter}
Write new label?: [y]
{Enter}
You can see the result in the image below:
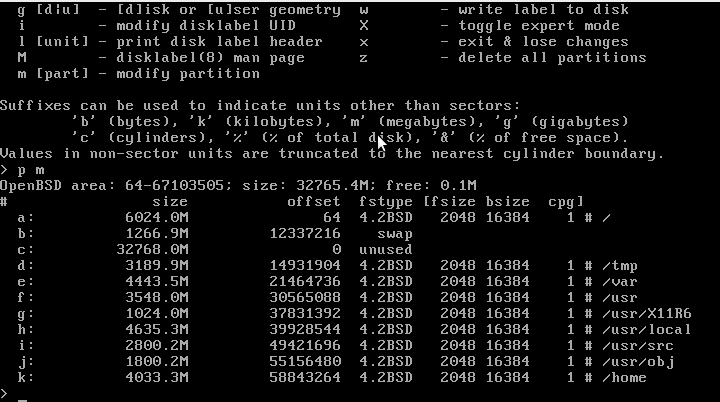
Partitions layout after correction
(next section starts here)
You will now choose which package sets you will install. I will only add the “bsd.mp” package as my machine has more than one processor.
Lets install the sets!
Location of sets? (cd disk ftp http or 'done') [cd]
{Enter}

Available CD-ROMs are: cd0
Which one contains the install media? (or 'don') [cd0]
{Enter}

Pathname of the sets? (or 'done') [4.8/amd64]
{Enter}

Set name(s)? (or 'abort' or 'done') [done]
bsd.mp{Enter}

Set name(s)? (or 'abort' or 'done') [done]
{Enter}
(installation of sets, can take a while)
Just accept the default when the installer asks for the same question.
Location of sets? (cd disk ftp http or 'done') [done]
{Enter}
Set the correct date by accepting the default.
Time appears wrong. Set to (date of day)? [yes]
{Enter}
Well, believe it or not, but you just installed OpenBSD on your machine ! Now is a good time to reboot, after you ejected the installation media :
reboot
OpenBSD is now starting and the FVWM window manager should be launched if you chose to start the X Window System automatically.
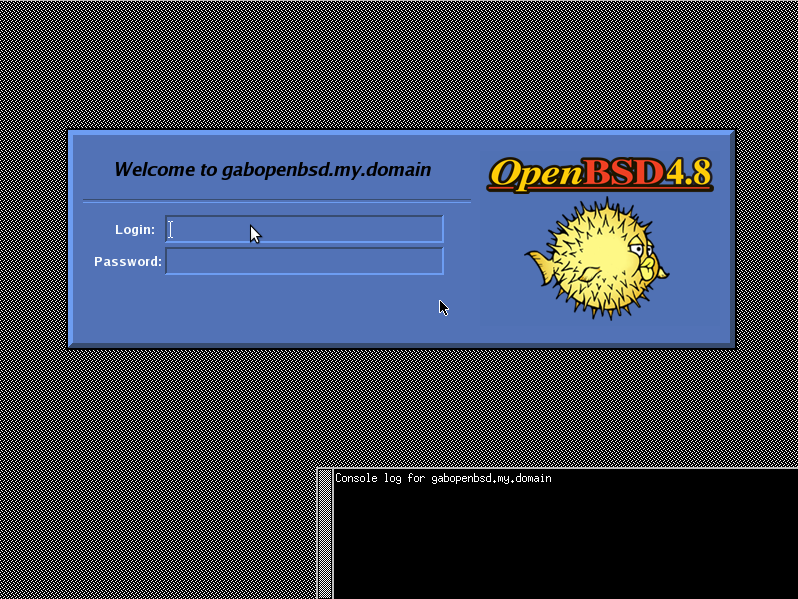
Open BSD login screen

FVWM, the OpenBSD’s window manager
Congratulations !
If you don’t like the default window manager, you can install Gnome or KDE for example. If you want to install Gnome, just go to read our tutorial.

Good stuff.
The thanks might be several years late, but this tutorial will help many.