
Installing XFCE in OpenBSD 4.8
Notice
This document is aimed at people willing to install the official XFCE package on a fresh and default install of OpenBSD 4.8. This tutorial is the continuation of a previous tutorial aimed at installing Gnome in OpenBSD 4.8 (click here to read it).
While several other documents exist, I didn’t find one with all the necessary steps. I somehow managed to make it work, so I would like to share this experience with you, if it can make you avoid some hassles.
This document tries to be as precise and accurate as possible. However it may not be perfect, and it is of course possible that it does not work in your configuration. It worked with mine, but your comments, corrections and suggestions are welcome, and this document will be updated accordingly.
This tutorial is quite similar to the tutorial for Gnome. However the steps differ a little so I will try to add more details and explanations.
We will pass from this :
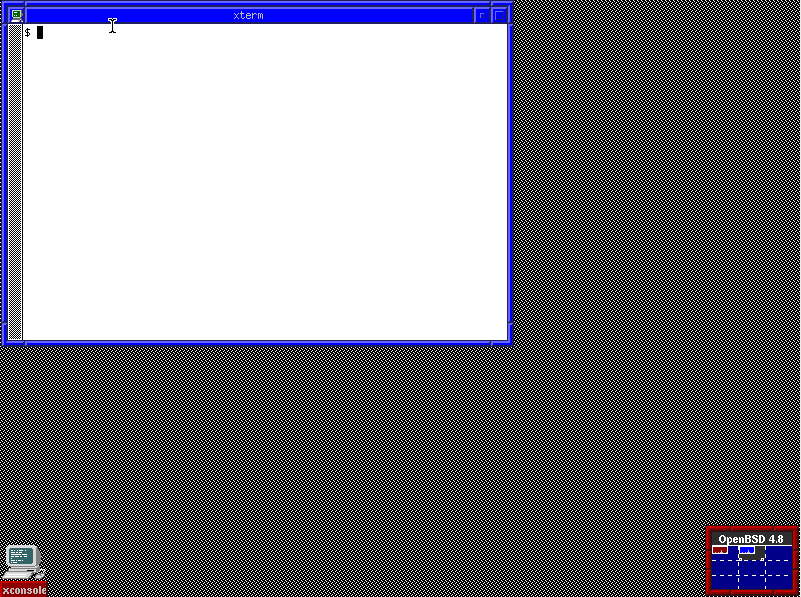
FVWM, OpenBSD default window manager
To this:
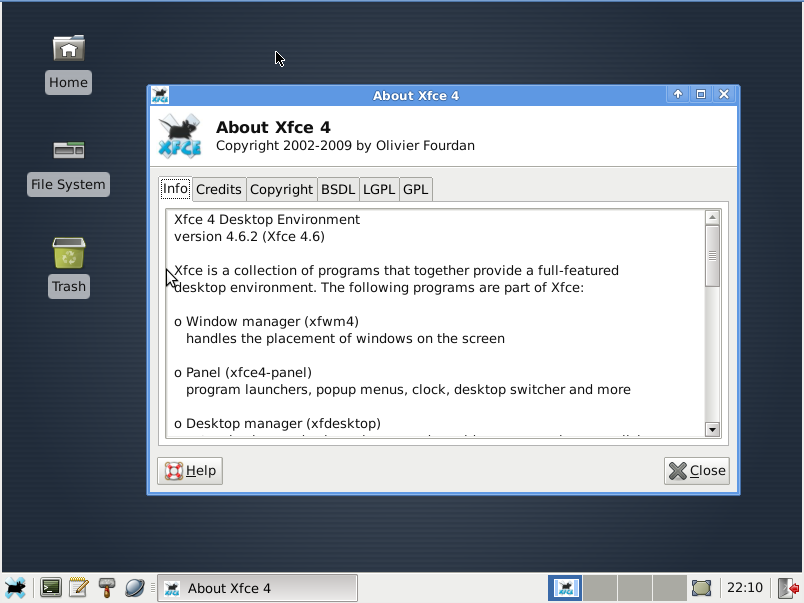
XFCE about window
What is the interest to install XFCE on an OpenBSD system ?
Well the interest is only valid if you plan to make a workstation of OpenBSD (servers don’t need it). As you are reading this article, you are most probably already convinced of the benefits of XFCE. However, if comparing the two previous screenshots didn’t convinced you yet, there are several advantages to install XFCE on top of OpenBSD for a workstation:
- A workstation should be responsive
- A workstation should not be bloated with unused applications
- A workstation should be secure
- A workstation should be stable
- A workstation should be simple
- A workstation should be user-friendly
- A workstation should be easy to maintain and upgrade
OpenBSD + XFCE can do just that. More, OpenBSD permits to install a recent operating system on machines you’d think they are outdated. 256MB of RAM and 4GB of hard disk space should be enough for OpenBSD+XFCE.
If you are not convinced, you can have a look at the following screenshot concerning OpenBSD memory usage after I booted (I used conky):
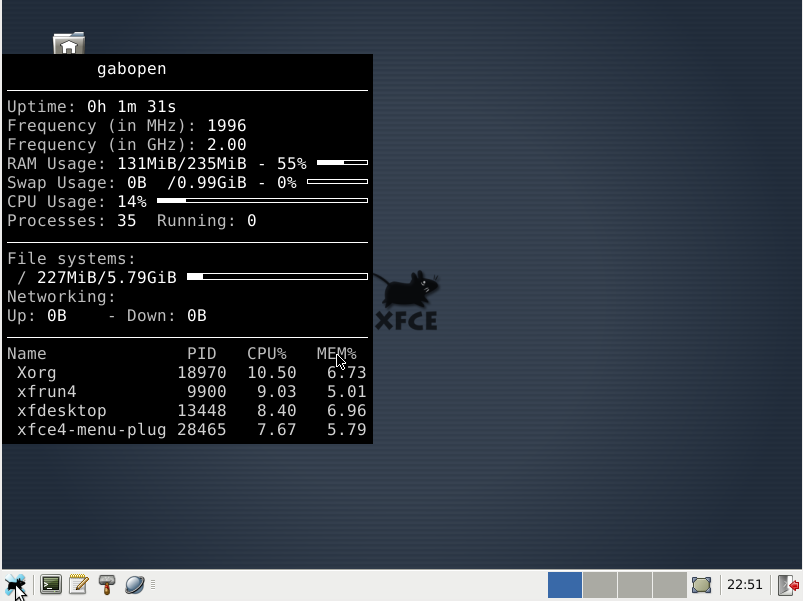
OpenBSD memory usage with XFCE
That’s right! OpenBSD just uses about 130 MB of RAM with XFCE! And that’s even a lot for an OpenBSD system (I used to have about 70 MB with Gnome, so XFCE is not as lightweight as it pretends).
Ready to install? Let’s go!
After a fresh default install of OpenBSD 4.8 (read this if you don’t know how to install it), open a terminal (xterm by default).
First, make sure that you are in your home directory :
$ pwd
It should display /home/your_user_name/. If not, cd to your home directory.
Then become root :
$ cd ~your_user_name
$ su
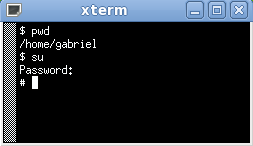
OpenBSD xterm
Note: I advise you create a cache for the downloaded packages (specify a location with sufficient free space, 2.5 GB will not be too much) for easy and fast re-installation in case something goes wrong. To create the cache directory, type the following command :
# mkdir /path_to_your_pkg_cache
Then set and export the PKG_CACHE environment variable :
# export PKG_CACHE=/path_to_your_pkg_cache/
You can install the nano text editor for a convenient editing of config files (optional step, you can use vi if you prefer) and set the nowrap mode to avoid the automatic creation of new lines, which is an undesirable behavior:
# pkg_add http://ftp.openbsd.org/pub/OpenBSD/$(uname -r)/packages/$(uname -m)/nano-2.2.4.tgz
# echo 'set nowrap' > /root/.nanorc
# exit
$ echo 'set nowrap' > .nanorc
$
If you are new to OpenBSD, the pkg_add command is used to install a package into your system. If you come from Linux, you probably know some commands such as apt-get, aptitude, emerge, etc.
Its most useful arguments are -v, -vv, -vvv, -vvvv, -vvvvv which represent the verbosity level of the command output; -i which enables the interactive mode; the path to the package comes last.Let met also explain briefly the uname command.
In the previous pkg_add line, I used uname -r and uname -m. The first will output the version of OpenBSD (4.8 in my case) and the second command outputs the architecture (amd64 in my case).
For more detailed informations about these commands, do not hesitate to use the man command with the command name in argument.
You can use another URL for the pkg_add line, if you find that another mirror is faster.
Now we should set the PKG_PATH environment variable so that the pkg_add command knows where to search for the packages and to save us from typing the full mirror URL at each command. This is done in the .profile file located in your home directory :
$ nano .profile
Append/modify the following lines :
PKG_PATH=http://ftp.openbsd.org/pub/OpenBSD/$(uname -r)/packages/$(uname -m)/
ALT_PKG_PATH=http://ftp.chg.ru/pub/OpenBSD/$(uname -r)/packages/$(uname -m)/
PKG_CACHE=/path_to_your_pkg_cache/
export PKG_PATH ALT_PKG_PATH PKG_CACHE
Take extra-care to specify two different and fast mirrors if you don’t want to wait two days at each pkg_add command…
CTRL+X, Yes, Enter will save the file and close nano.
Let’s do the same for the root account :
$ su
# nano /root/.profile
Append/modify the following lines :
PKG_PATH=http://ftp.openbsd.org/pub/OpenBSD/$(uname -r)/packages/$(uname -m)/
ALT_PKG_PATH=http://ftp.chg.ru/pub/OpenBSD/$(uname -r)/packages/$(uname -m)/
PKG_CACHE=/path_to_your_pkg_cache/
export PKG_PATH ALT_PKG_PATH PKG_CACHE
CTRL+X, Yes, Enter will save the file and close nano.
Reboot :
# reboot
In addition, you may type the 8 previous lines directly in the terminal if you don’t want to reboot now, so that the environment variables are updated. After reboot, you can check by typing the following commands :
$ echo $PKG_PATH
$ echo $ALT_PKG_PATH
$ echo $PKG_CACHE
$ su
# echo $PKG_PATH
# echo $ALT_PKG_PATH
# echo $PKG_CACHE
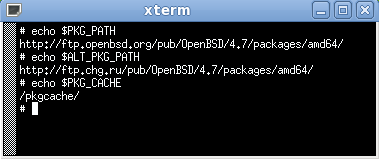
Checking the environment variables
Following the suggestion of Peter Ljun,g note that it is not compulsory to add the version number and the file extension of the package in your pkg_add lines.
I always specify the full package path because my connection is slow and this way pkg_add does not have to search for the correct version number. When you don’t add the version number, pkg_add will download the full package listing, which can consume a lot of time if you are on a slow connection, especially if the package you are installing has a lot of dependencies.
For example, the following pkg_add lines are also valid if you want to install nano. If PKG_PATH is not yet set:
# pkg_add http://ftp.openbsd.org/pub/OpenBSD/$(uname -r)/packages/$(uname -m)/nano
If PKG_PATH is already set, you can simply type :
# pkg_add nano
I guess that you now feel the interest of setting PKG_PATH, don’t you ? 🙂
In addition, you can install several packages at a time, by simple separating them by a space. In this tutorial, I chose to install each package at a time for clarity purpose.
If you want to know the full package filename, just go to the packages root path and note the full filename of the package. In my case I had to go to http://ftp.openbsd.org/pub/OpenBSD/4.8/packages/amd64/. You have to go to the right packages root path related to your architecture and OpenBSD version.
The environment is now ready for XFCE. Here is the command to install XFCE itself :
# pkg_add -i -vv xfce4-session-4.6.2p0.tgz
Then wait possibly few hours if you are on a very slow connection like me… Or a few minutes if you have a fast Internet connection.
At this point, your $PKG_CACHE directory should contain at least the following packages:
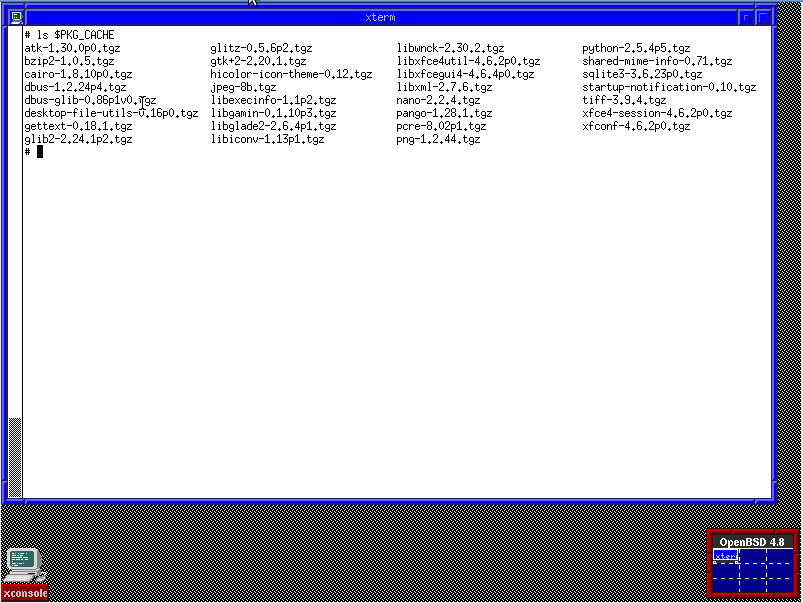
Cached packages after the installation of xfce4-session
Done ? You should now install some few more packages to make your experience more enjoyable:
# pkg_add -i -vv gtk-xfce-engine-2.6.0p2.tgz
# pkg_add -i -vv libxfce4menu-4.6.2p0.tgz
# pkg_add -i -vv xfdesktop-4.6.2p0.tgz
# pkg_add -i -vv xfce4-appfinder-4.6.2p0.tgz
# pkg_add -i -vv xfce4-battery-0.5.0p9.tgz
# pkg_add -i -vv xfce4-clipman-1.1.0p1.tgz
# pkg_add -i -vv xfce4-dict-0.6.0p0.tgz
# pkg_add -i -vv xfce4-diskperf-2.2.0p4.tgz
# pkg_add -i -vv xfce4-fsguard-0.4.0p7.tgz
# pkg_add -i -vv xfce4-genmon-3.2p4.tgz
# pkg_add -i -vv xfce4-mailwatch-1.1.0p4.tgz
# pkg_add -i -vv xfce4-modemlights-0.1.3.99p2.tgz
# pkg_add -i -vv xfce4-mount-0.5.5p0.tgz
# pkg_add -i -vv xfce4-mpc-0.3.5p0.tgz
# pkg_add -i -vv xfce4-netload-0.4.0p5.tgz
# pkg_add -i -vv xfce4-notes-1.7.2p1.tgz
# pkg_add -i -vv xfce4-notifyd-0.1.0p2.tgz
# pkg_add -i -vv xfce4-places-1.2.0p1.tgz
# pkg_add -i -vv xfce4-quicklauncher-1.9.4p1.tgz
# pkg_add -i -vv xfce4-screenshooter-1.6.0p5.tgz
# pkg_add -i -vv xfce4-smartbookmark-0.4.2p3.tgz
# pkg_add -i -vv xfce4-systemload-0.4.2p6.tgz
# pkg_add -i -vv xfce4-taskmanager-1.0.0p0.tgz
# pkg_add -i -vv xfce4-time-out-0.1.0p6.tgz
# pkg_add -i -vv xfce4-verve-0.3.5p8.tgz
# pkg_add -i -vv xfce4-wavelan-0.5.5p3.tgz
# pkg_add -i -vv xfce4-weather-0.7.3p2.tgz
# pkg_add -i -vv xfce4-wmdock-0.2.0p5.tgz
# pkg_add -i -vv xfce4-xkb-0.4.3p6.tgz
# pkg_add -i -vv xfce-utils-4.6.2p0.tgz
At this point, your $PKG_CACHE directory should now contain a lot of files. Here it is after I (mistakenly) installed xfce4-dev-tools:
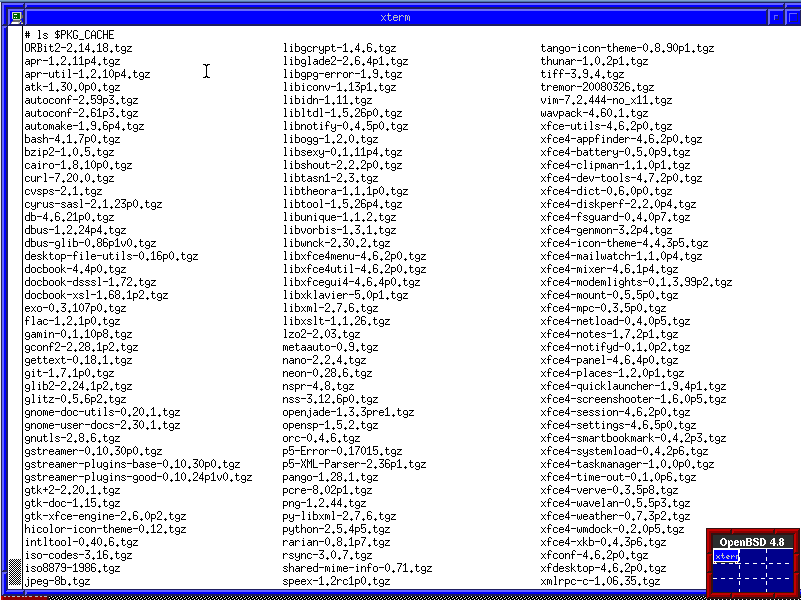
Cached packages after the installation of various XFCE packages
Optional packages
Install ONLY if you plan to compile on your workstation, as it will install plenty of libraries…
# pkg_add -i -vv xfce4-dev-tools-4.7.2p0.tgz
Install ONLY if you want to be able to play audio files, will install plenty of libraries…
# pkg_add -i -vv xfce4-mixer-4.6.1p4.tgz
Install ONLY if you want to be able to print
pkg_add -i -vv xfprint-4.6.1p5.tgz
For your convenience:
### A terminal
# pkg_add -i -vv terminal-0.4.5p0.tgz

### A text editor
# pkg_add -i -vv mousepad-0.2.16p4.tgz

### A calendar
# pkg_add -i -vv orage-4.6.1p5.tgz

### An image viewer
# pkg_add -i -vv ristretto-0.0.22p2.tgz

###For resizable SVG icons support
# pkg_add -i -vv librsvg-2.26.3p0.tgz
You are advised to read the following files concerning XFCE installation:
- /usr/local/share/xfce4/INFO
- /usr/local/share/xfce4/README.OpenBSD
You can install the default window manager for XFCE by typing the following command:
# pkg_add -i -vv xfwm4-themes-4.6.0p1.tgz
There are good chances that if you reboot, xdm is still started, and/or the FVWM window manager is still displaying instead of XFCE. So do the following:
# nano /etc/rc.conf.local
Append/modify the following line (there should be initially nothing after the “=”, you must change this to “NO“):
xdm_flags=NO
XFCE can be started using the script “startxfce4“. There are two methods to start XFCE. The first one starts XFCE after a successful login in tty1 (not graphical!) and typing the “startx” command, while the other one uses SLiM to login then start XFCE (graphical). The second method requires to follow the first method as a prerequisite.
Method 1: tty1 login and startx
You have to create a file named “.xinitrc” in your home directory. This file will be launched automatically when X is starting. I chose to create this file for root and for my user.
# echo 'exec startxfce4' > /root/.xinitrc
# chmod +x /root/.xinitrc
# exit
$ echo 'exec startxfce4' > .xinitrc
$ chmod +x .xinitrc
Now you can just type the following command to start XFCE, after a successful login:
$ startx
Method 2: Using SLiM as graphical login manager
Install the following packages:
# pkg_add -i -vv slim-1.3.1p3.tgz
# pkg_add -i -vv slim-themes-1.2.3p2.tgz
Then we have to add a script that will control SLiM:
# nano /etc/slim
Add the following content into the file:
#!/bin/sh
#
# /etc/rc.d/slim: start/stop slim
#

case $1 in
start)
    /usr/local/bin/slim -d
    ;;
stop)
    killall /usr/local/bin/slim
    ;;
restart)
    $0 stop
    sleep 5
    $0 start
    ;;
*)
    echo "usage: $0 [start|stop|restart]"
    ;;
esac

# End of file
CTRL + X, y, Enter to save the file. Now make the script executable:
# chmod +x /etc/slim
We are one step from the end! Edit the file /etc/rc.local:
# nano /etc/rc.local
Add the following line in the end of the file:
/etc/slim start
CTRL+X, Yes, Enter will save the file and close nano.
Here is what SLiM looks like:

SLiM login screen
If you want, you can now start XFCE by rebooting or typing directly:
$ startx
(you don’t need to be root)
Finally, reboot and enjoy your XFCE !
# reboot
XFCE is now installed and running along with SLiM on the most secure OS available. Nice, isn’t it ?
Finally you can customize your XFCE desktop, for example you may want to change the screen resolution, and use it as an OpenBSD workstation or whatever use you can find.
Some screenshot of XFCE running on OpenBSD 4.8 for the pleasure :
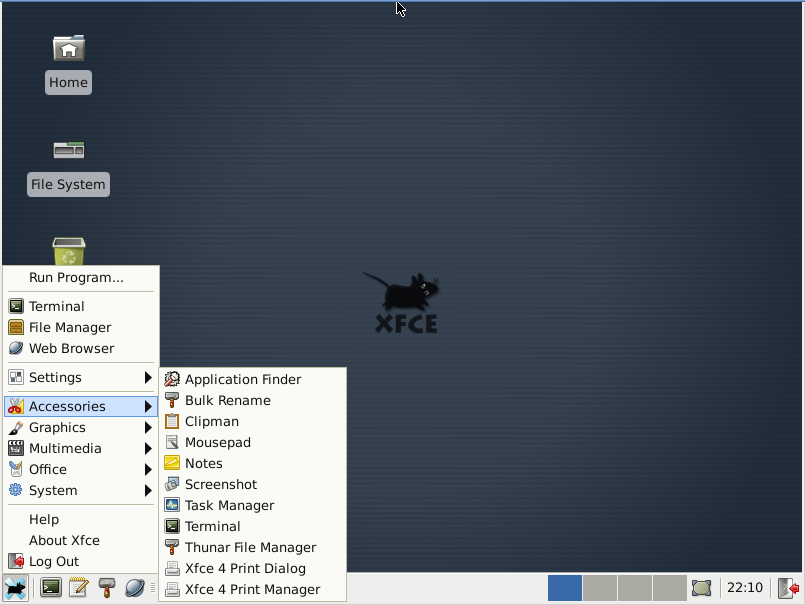
XFCE menu
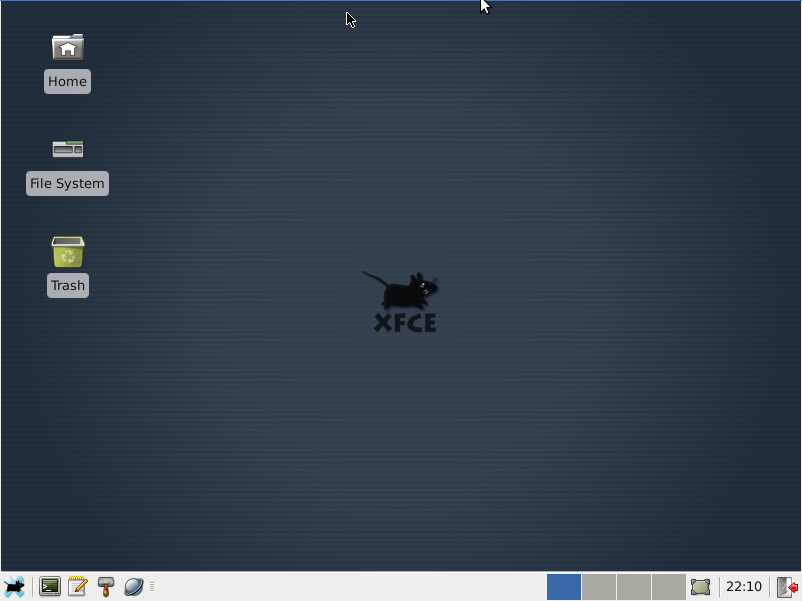
XFCE desktop
Troubleshooting and FAQ
Q : Why is your xterm window different than mine ?
A : Because I took the screenshot in a Gnome Desktop session (not XFCE). But is that important?
Q : Why do you install XFCE on OpenBSD in the first place ?
A : And why not ? OpenBSD is the perfect candidate for a workstation machine : secure, stable, not bloated with 3000 widgets. Of course one wouldn’t work on a worskstation if it is not a minimum beautiful and convenient. XFCE is here to correct this problem. I have nothing against FVWM for a terminal station, but I definitely prefer XFCE as a workstation user interface.
Q : Do you plan to make a similar tutorial for KDE ?
A : Yes. But I don’t know when.
Q : How to install OpenBSD ?
A : Get the iso, then just burn the install48.iso file to a CDR, reboot and press Enter a few times. Here it is, you just installed OpenBSD! For detailed informations, you can check this tutorial: http://www.gabsoftware.com/tips/tutorial-how-to-install-openbsd-4-8-step-by-step/.
Q : Is your document also valid for FreeBSD or NetBSD ?
A : I don’t know. Most probably not. But you can try and tell me your findings.
Finally
Here it is, this is the end of this document and I hope it will help someone as much as it would have helped me if I found it when I needed it !
Regards,
Gabriel Hautclocq

good Tutorial!!!.
I personally prefer kde, but for machines with fewer resources xfce
@_alekid
Thanks!
Very Nice Tutorial.
BTW, I’ve never been to this site before, but when I tried to register I got this ERROR:
Banned IP address.
ERROR: Registration stopped by Sabre.
Hi, your IP and/or your email address are probably blacklisted by spam lists. You will have to solve this problem first, then you will be able to register to this website 😉
Nice work, however after my base install of OpenBSD 4.8(i386) I get garbled text just midway the boot process on an Acer veriton 261 desktop pc, how can I fix this?
Hi Joseph,
I don’t know, is it happening after you tried to install XFCE?
If yes, I suggest that you contact the XFCE support 🙂
This is a great tutorial. I also installed Mozilla Firefox and set it as my default browser. I run Slackware Linux 13.37 mostly. OpenBSD is – I think – a first cousin of Linux and experience with Slackware helps because Slack is the most BSD like Linux distro. Now I would like to install Adobe Flash Player to go with Firefox. Is there a port or package for OpenBSD? Will Google that if I do not hear from you. Follow me on Twitter @GypsyChief
This is one of the best tutorials I have found on OpenBSD, and I thank you for that! I have one question though, every time I login with a non-root account it says “failed to start x-windows” or something along those lines and then it loops back to SiLM, the root account works fine though. I think I may have to add permissions to the user, but I wanted to know your opinion. I’m using OpenBSD 5.2.
Thanks for your time!
Thanks!! it worked
thank you dear
Good tutorial,I wrote just :
PKG_PATH=http://ftp.openbsd.org/pub/OpenBSD/$(uname -r)/packages/$(uname -m)/
PKG_CACHE=/root/ebra
export PKG_PATH PKG_CACHE
at the beginning of the /root/.profile and save it.?it is correct path?
but as going to typed echo $PKG_PATH in terminal,didn’t show any things.
in addition to didn’t install package via using pkg_add -i -vv xfprint-4.6.1p5.tgz at the terminal.
Ahhh yeahhhhhh! Worked great! -OpenBSD 5.3
You mention including “/etc/slim start” in your /etc/rc.local but I think you mean “/etc/rc.d/slim start”?
Ah, XFCE in 5.5 includes/installs that script by default in /etc/rc.d instead of /etc which is why I had to adjust it.
I’m trying to install Xfce4 on a SunBlade 100 machine running OpenBSD 5.6.
OpenBSD is running fine, using X11. The procedure as outlined in your tutorial will run to completion (BTW – thanks for that). When I try starting the application, it freezes the screen and mouse. The only way to recover is to powercycle (while crossing my fingers). Any ideas on what could be causing this?